

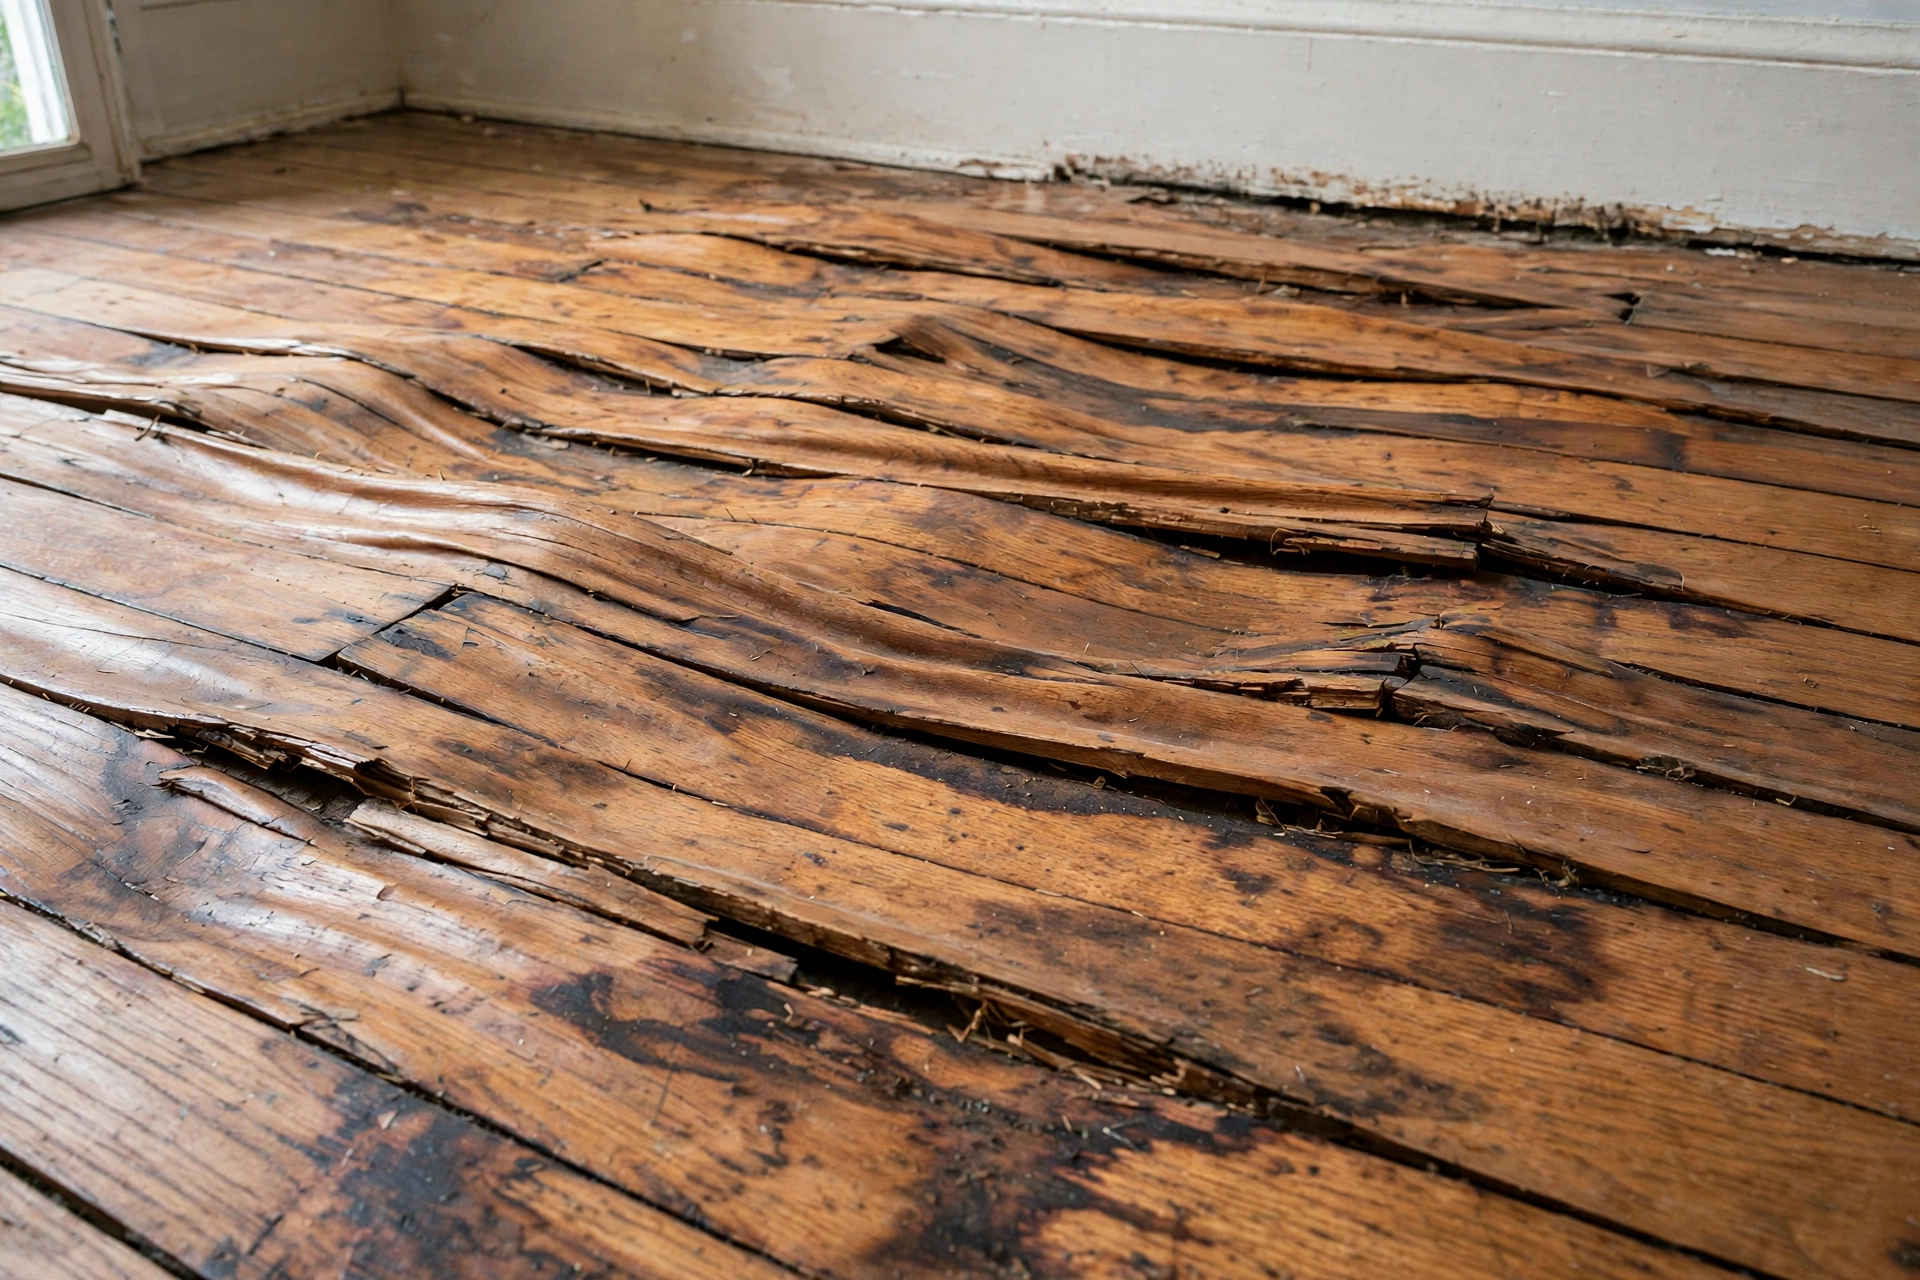
Hardwood floors and water have never been friends, but a wet hardwood floor is not automatically a ruined one. Wood is remarkably resilient when dried correctly and promptly, and many floors that look alarming in the first days after a leak flatten back out on their own. The key is knowing what the floor is telling you and resisting the urge to fix it too fast.
The most common mistake homeowners make with wet hardwood is rushing to sand it flat while it is still swollen. Sanding a cupped floor before it dries removes wood from the raised edges, and when the boards shrink back, you end up with a permanently wavy floor. Patience is not just a virtue here; it is the entire repair strategy.
This guide explains the three classic symptoms, cupping, crowning, and buckling, how to dry a wood floor without causing new damage, and how to choose between refinishing, board replacement, or a full tear-out. For the emergency steps when water first arrives, our first-hour water damage checklist covers shutoffs and initial response.
How wood reacts to water: cupping, crowning, and buckling
Cupping is the most common and least alarming. The edges of each board rise higher than the center, creating a washboard texture across the floor. Cupping happens when the bottom of the boards absorbs more moisture than the top, usually from water underneath or high humidity below the floor, and cupped floors often flatten on their own once moisture levels equalize.
Crowning is the reverse: the center of each board rises above the edges. Crowning usually means the top of the floor got wet while the bottom stayed drier, or that someone sanded a cupped floor before it finished drying. A crowned floor rarely flattens on its own and typically needs professional sanding after full drying.
Buckling is the serious one. Boards lift completely off the subfloor, sometimes tenting upward at the joints. Buckling means the wood expanded beyond what the installation’s expansion gaps could absorb, usually after prolonged or severe water exposure. Buckled sections almost always need board replacement, and the subfloor underneath needs inspection too.
The first 24 hours: what to do immediately
Speed matters, but so does gentleness: wood responds badly to rapid, uneven drying, so the first day’s goal is controlled moisture removal, not blast-furnace heat.
- Stop the water source and remove standing water with a wet vacuum or towels. Do not let water sit on the finish.
- Remove rugs, furniture, and anything trapping moisture against the floor.
- Run a dehumidifier in the room and keep it between 30 and 50 percent relative humidity, the range the EPA recommends for indoor air quality and healthy wood.
- Increase gentle air circulation with fans, but do not aim high heat directly at the floor. Excessive heat dries the surface faster than the core, which worsens cupping and can crack boards.
- Do not sand, and do not assume the floor is ruined. Document the damage with photos for insurance before you touch anything.
- Resist the urge to pry up boards to “let it dry faster.” Lifting boards breaks the tongue-and-groove joints and turns a drying job into a replacement job. The floor needs to dry as an assembly.
- Do not use heat guns, space heaters aimed at the floor, or steam cleaners. Concentrated heat shocks the wood surface, causing cracking and finish damage.
If water came from above, check the ceiling and walls too. The signs of water damage in walls often accompany floor damage from the same incident, and the drying principles overlap with our guide on drying wet carpet, though wood demands a slower hand.
How professionals dry hardwood floors
Restoration companies dry hardwood in place whenever possible with desiccant or refrigerant dehumidifiers and specialized floor drying mats. The mats seal against the floor and pull moisture out of the wood with controlled negative pressure, drying boards evenly from top to bottom.
The professional process typically runs 3 to 7 days, with daily moisture readings in the wood and subfloor. The target is to bring moisture content within a few percentage points of its normal equilibrium, usually 6 to 9 percent in most U.S. homes. Only once readings stabilize do pros assess the floor’s long-term condition.
DIY drying follows the same principles at lower intensity: steady dehumidification, gentle airflow, patience, and a moisture meter to track progress. A pin meter with a wood scale costs $30 to $50 and is essential, because the floor can look recovered weeks before its internal moisture normalizes.
The waiting game: why you should not sand too soon
This is where most DIY repairs go wrong. A cupped floor that is still drying will often flatten substantially on its own over 4 to 8 weeks as moisture equalizes. Sanding during this window cuts the raised edges off boards that were going to settle back down, leaving permanent unevenness.
The correct sequence is: dry completely, wait for the floor to acclimate for at least a month after meter readings normalize, then evaluate. If cupping remains after full drying and acclimation, a light screen-and-recoat or full sand and refinish can level minor residual unevenness. If the floor flattened on its own, you may need nothing more than a fresh topcoat.
Wood flooring associations and restoration standards agree on the core principle: never sand a water-damaged wood floor until its moisture content has returned to normal and stabilized, a process that takes weeks, not days.
Repair options from least to most invasive
Option 1: Dry and wait
For mild cupping from a brief exposure, thorough drying followed by patience resolves many cases with no further work. Cost: essentially the price of dehumidifier rental or a slightly higher electric bill.
Option 2: Screen and recoat
If the floor flattened but the finish looks dull or water-spotted, a screen-and-recoat lightly abrades the existing finish and applies a fresh topcoat. This refreshes appearance without full sanding. Typical cost: $1.50 to $3 per square foot professionally.
Option 3: Sand and refinish
For residual cupping or crowning after full drying, or for finish damage that screening cannot fix, a full sand and refinish levels the floor and restores it. This removes a thin layer of wood, so it can only be done a limited number of times over a floor’s life. Typical cost: $3 to $8 per square foot.
Option 4: Board replacement
Buckled boards, boards with deep staining that sanding cannot reach, and sections where the tongue-and-groove joints failed need individual replacement. A skilled installer can lace new boards into the existing floor, though matching aged wood perfectly is difficult. Typical cost: $8 to $15 per square foot for the repaired area.
Option 5: Full replacement
Widespread buckling, subfloor damage, or contamination from gray or black water means the floor comes out. Our guide on water damaged subfloor assessment covers what pros look for underneath, because floor replacement without addressing a damaged subfloor just schedules the next failure.
What affects the cost
Several factors move the final bill up or down. Solid hardwood is more forgiving than engineered wood, since it can be sanded more times and tolerates deeper drying. Exotic species and wide-plank floors cost more to repair and replace. The water category matters enormously: clean water damage might need only drying and refinishing, while any gray or black water exposure usually forces replacement for health reasons.
Timing is a cost factor too. Drying started within 24 hours, inside the window the EPA highlights for preventing mold, keeps the job in the drying-and-refinishing range. A floor left wet for a week often jumps straight to replacement. For a typical 200 square foot room, expect $500 to $1,500 for professional drying, $600 to $1,600 for sand and refinish, and $2,000 to $4,500 for full replacement with mid-range oak.
Frequently Asked Questions
Will cupped hardwood floors go back to normal on their own?
Often, yes, if the cupping is mild and the floor is dried properly and given time. Many cupped floors flatten substantially over 4 to 8 weeks after moisture normalizes. Do not sand until the floor has fully dried and acclimated, or the unevenness becomes permanent.
Can you fix buckled hardwood floors without replacing them?
Rarely. Buckling means boards have lifted off the subfloor, and they almost never settle back correctly. Individual buckled boards can sometimes be replaced without redoing the whole floor, but widespread buckling means replacing the affected area at minimum.
How do I know if water got under my hardwood floor?
Cupping is the classic sign of moisture underneath. You may also notice a musty smell, discoloration along board edges, or a hollow sound when walking. A moisture meter reading through the floor, or an inspector’s thermal camera, confirms what the surface suggests.
Does homeowners insurance cover hardwood floor water damage?
Sudden and accidental water damage, like a burst pipe, is typically covered, including drying, refinishing, or replacement as needed. Gradual leaks and floodwater are generally excluded. Document the damage thoroughly before any work begins and get the adjuster involved early.
Is it safe to use a steam mop on a previously water-damaged floor?
No. Steam mops force moisture into wood and are a bad idea for any hardwood floor, especially one recovering from water damage. Stick to a barely damp mop or hardwood-specific cleaner, and keep indoor humidity in the 30 to 50 percent range.
The bottom line
Wet hardwood rewards patience and punishes haste. Dry it gently, verify with a meter, wait for it to settle, and only then decide whether it needs refinishing or board work. Most floors that get prompt, proper drying survive with their character intact.
The floors that do not survive are usually victims of delay or sanding too soon, both avoidable. And if the damage extends below the boards, have the subfloor evaluated using our subfloor assessment guide before investing in refinishing wood that sits on a compromised foundation.