

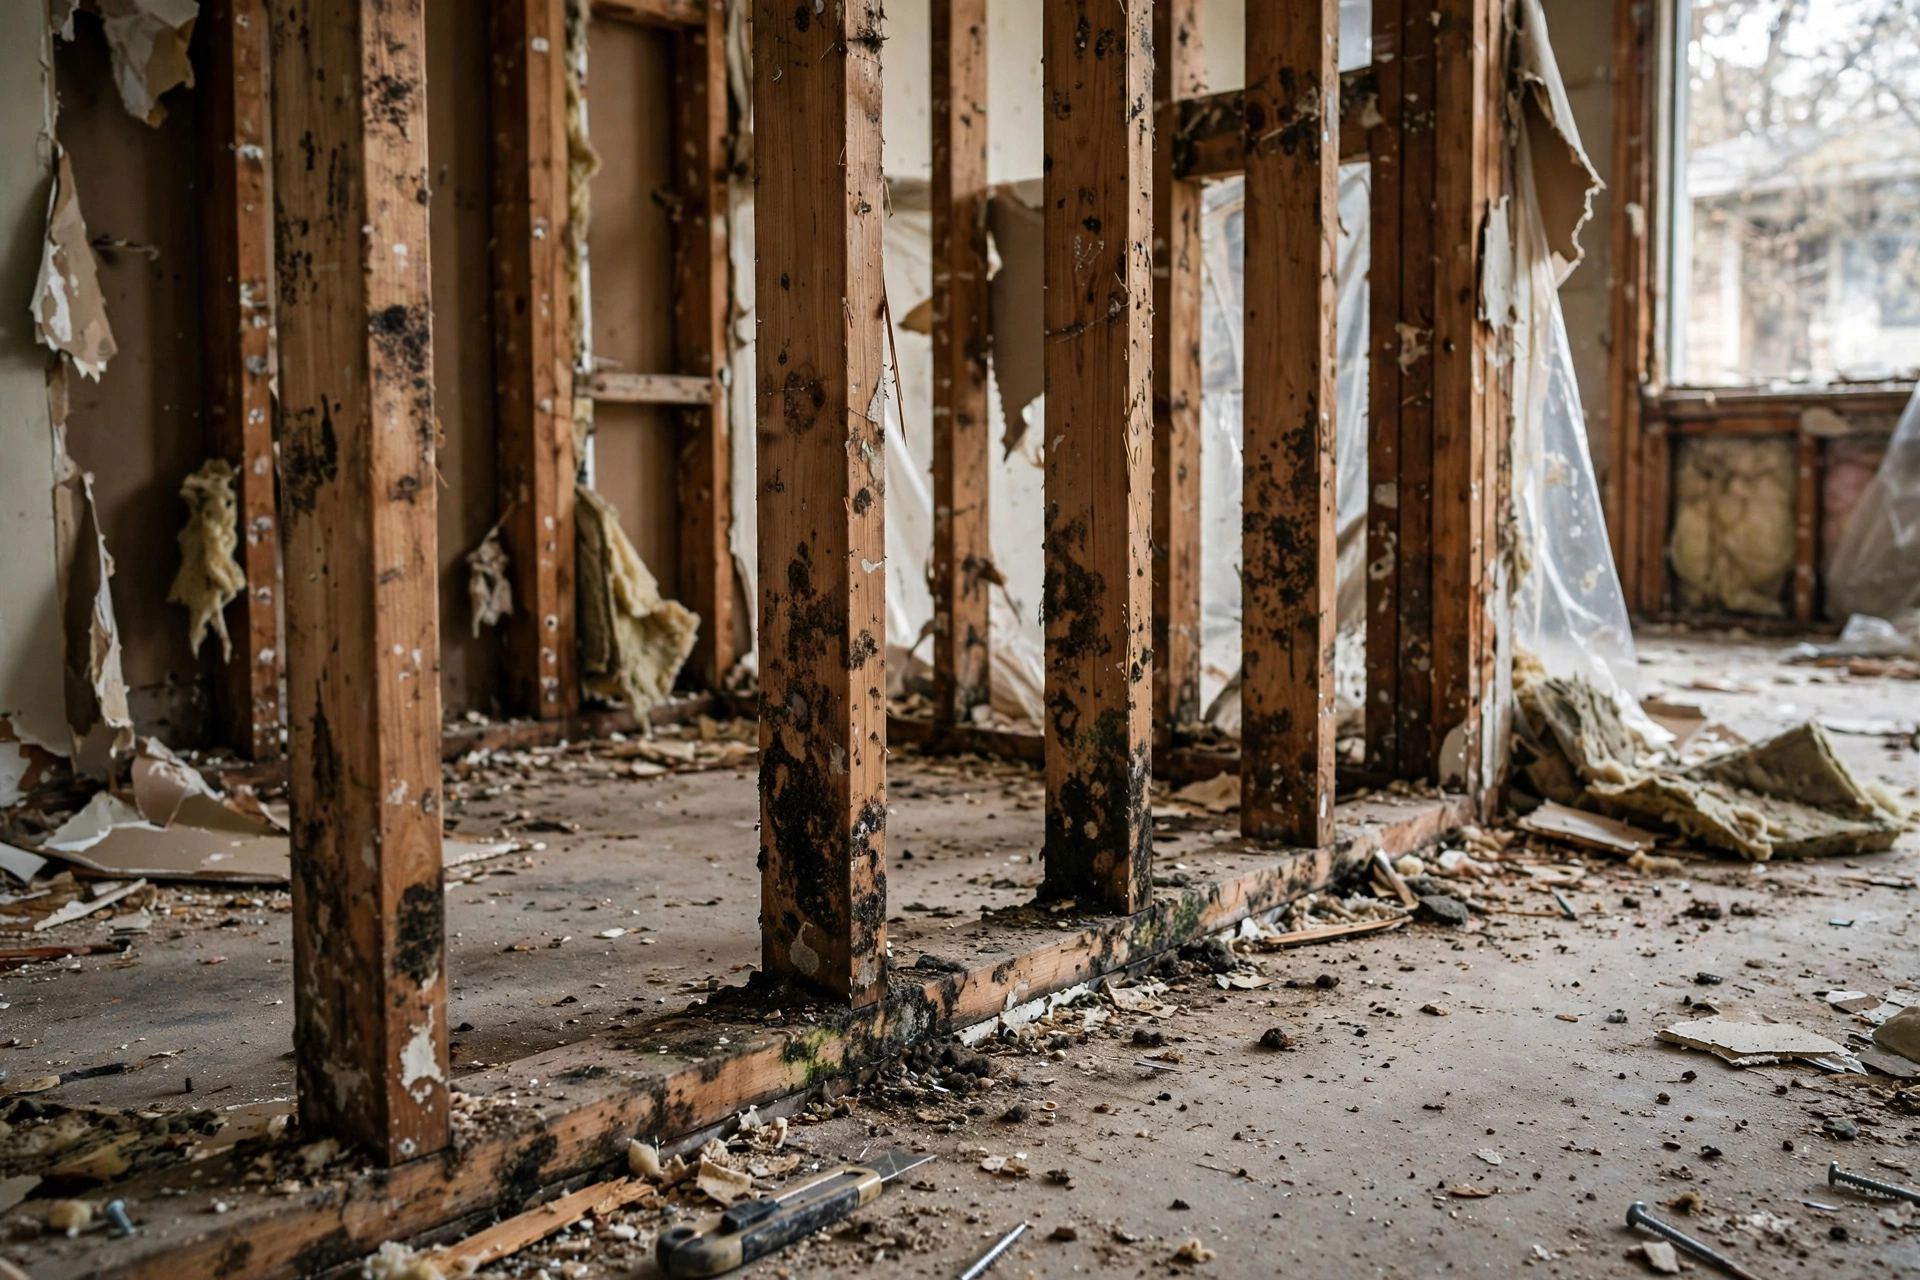
Open up a water-damaged wall and you will often find the studs behind the drywall spotted with mold. It happens fast: wood framing soaked by a leak or flood gives mold everything it needs, moisture plus an organic food source, and growth can start within a day or two of wetting.
The good news is that framing lumber is thick, solid wood, which makes it far more forgiving than drywall or carpet. Mold on studs can usually be cleaned and saved. The bad news is that doing it wrong, scrubbing without containment, bleaching without drying, or painting over growth, just sets you up for a repeat.
This guide covers the process the way a remediation crew does it: safety gear, simple containment, the HEPA vacuum and scrub sequence, why bleach is the wrong tool for porous wood, how to dry framing to a safe moisture level, and how to decide whether a stud can be saved or needs replacing. For an overview of when the whole job is DIY-appropriate, see our guide to DIY mold remediation.
Why mold grows on studs after water damage
Wood absorbs and holds water from its surroundings. After a leak or flood, framing can sit at 30 to 40 percent moisture content, and mold needs only sustained moisture above roughly 20 percent plus a food source to colonize. Lumber, plywood sheathing, and the paper facing on nearby drywall are all food.
The worst growth appears on the back side of drywall and the faces of studs inside the wall cavity, where airflow is poor and drying is slow. That is why mold on framing surprises homeowners: the room looks fine while the inside of the wall is a greenhouse.
Mold on framing also tells you the wall was wet long enough to matter. Light surface spotting after brief wetting is a weekend cleanup. Heavy, fuzzy growth through the grain means the wood stayed wet for weeks, so check the sill plate, subfloor, and insulation in the same cavity.
Safety gear and containment basics
Wear an N95 respirator fitted snugly with no gaps at the seal, safety goggles that seal against the face (not glasses), and nitrile or rubber gloves covering your wrists. Long sleeves and pants keep spores off skin, and anything worn during cleanup should be washed hot or bagged and discarded afterward.
For a single wall cavity, containment can be simple: close the room’s door, tape plastic sheeting over the opening if the drywall is already removed, and turn off the HVAC or seal the room’s vents so spores are not pulled into the ductwork. Set a box fan in a window blowing outward to create negative pressure, exhausting work-area air outside.
The CDC’s 8 tips to clean up mold emphasize protective equipment and isolating the work area from the rest of the home. If anyone in the household has asthma, allergies, or a weakened immune system, keep them out of the house during the work.
Cleaning mold from wood framing, step by step
Work in this order; each step removes what the previous one loosened, and skipping ahead just smears mold around.
1. HEPA vacuum every surface
Start with a vacuum fitted with a true HEPA filter to capture loose spores from the studs, sill plate, and surrounding surfaces. Vacuum slowly with a brush attachment, covering all faces of the framing. This dry removal keeps the wet scrubbing from turning loose mold into a slurry that pushes deeper into the grain.
2. Scrub with detergent and water
Mix a mild detergent with warm water and scrub the framing with a stiff brush. The goal is mechanical removal: physically lifting mold off the wood, not sterilizing it. Work top to bottom so dirty water does not run over cleaned areas, and change the water often. The EPA’s mold cleanup guidance confirms that scrubbing mold off hard surfaces with detergent and water is the core of effective cleanup.
3. Sand out deep staining
Surface mold often leaves staining slightly into the grain. After scrubbing, let the wood dry, then sand stained areas with 80 to 120 grit sandpaper until you reach clean wood. Vacuum again with the HEPA vacuum after sanding to catch the dust.
4. Apply an antimicrobial treatment
After cleaning and sanding, apply a mold-killing product designed for porous wood, such as a borate-based treatment or a commercial antimicrobial. These leave a residual that discourages regrowth. Follow the product’s dwell time. This step is insurance, not a substitute for the mechanical cleaning above.
5. Consider an encapsulant once dry
After the wood meters below 20 percent moisture, you can apply an encapsulant, a paint-like coating that seals residual microscopic staining into the wood. Use a product designed for mold remediation, not ordinary primer, and only on fully cleaned, dry wood. Painting over active mold just hides it, so this step comes last, and it is optional in walls that will be covered with new drywall anyway.
Why bleach underperforms on porous wood
Bleach is the most reached-for mold cleaner and one of the least effective on framing lumber. The chemistry works against it: bleach’s active ingredient sits on the surface while its water component soaks into the porous wood, feeding the roots of the mold in the grain while the surface looks clean. The chlorine evaporates without reaching the embedded growth.
On non-porous surfaces like tile, bleach works fine. On wood, it typically produces a clean-looking surface that regrows within weeks. It also breaks down wood fibers with repeated use and leaves no residual protection. Our comparison of Concrobium vs bleach goes deeper on the chemistry, and our look at whether bleach kills mold on drywall covers the related drywall question.
Drying framing to a safe moisture level
Cleaning is only half the job. Mold returns to any wood that stays wet, so the framing must be dried below 20 percent moisture content, ideally to the 10 to 15 percent range typical of indoor lumber. Use a pin-type moisture meter and read the center of the wood, not just the surface, which dries first and lies to you.
Set up airflow across the open wall cavity with a fan and run a dehumidifier in the room, keeping the space at 30 to 50 percent relative humidity. Expect 3 to 7 days of active drying depending on how wet the framing was. Do not close the wall back up until readings hold steady below 20 percent for at least a day; sealing wet framing inside a wall is how the problem grows again behind new drywall.
The EPA advises that wet materials be dried within 24 to 48 hours to prevent mold growth, and that mold be cleaned off surfaces before they are dried or painted, per its brief guide on mold, moisture, and your home.
When to replace instead of clean
Most moldy studs can be saved, but replacement is the right call when the wood is structurally compromised. Probe it with a screwdriver: if the tool sinks in easily or the wood crumbles, rot has set in and cleaning will not restore strength. Replace thinner members like furring strips when mold has penetrated their full thickness, since sanding would remove too much material.
Also replace the sill plate if it stayed wet against the foundation for an extended period; it is the hardest piece to dry and the most critical structurally. Cut back to clean wood at least a foot past visible growth, bag the removed pieces, and treat the remaining framing with a borate preservative before closing up. If rot is widespread across multiple studs, that is beyond DIY scope: get a remediation contractor and possibly a structural assessment.
Frequently Asked Questions
Can I just spray bleach on moldy studs and call it done?
No. Bleach cleans the surface of porous wood but does not reach mold roots in the grain, so regrowth is common within weeks. Scrub with detergent, sand out staining, apply a borate-based or commercial antimicrobial, and dry the wood below 20 percent moisture. That sequence actually solves the problem.
How do I know if a stud is rotted or just stained?
Press a screwdriver into the wood. Stained but sound wood resists the tool and feels hard. Rotted wood is soft and crumbly, and the screwdriver sinks in with little pressure. Surface staining with hard wood underneath is a cleaning job; soft wood is a replacement job.
Do I need to remove insulation around moldy framing?
Wet fiberglass insulation should generally be removed and replaced; it loses insulating value when wet and is difficult to fully clean. Rigid foam can sometimes be cleaned and reused if intact. Bag wet insulation carefully so spores are not released into the room during removal.
How long does it take to dry wall framing after a leak?
With the wall open, good airflow, and a dehumidifier running, expect 3 to 7 days for framing to drop below 20 percent moisture content. Thick sill plates and framing against cold foundation walls dry slower. Verify with a pin meter in the center of the wood, not just the surface.
Should I hire a pro for mold on wood framing?
DIY is reasonable for a small area, roughly one wall cavity or less, where the wood is structurally sound and you can manage containment. Call a professional if mold covers more than about 10 square feet, if there is structural rot, if HVAC is contaminated, or if anyone in the home has serious respiratory conditions. Our guide to removing black mold helps you assess the scale first.
What to do next
Start with the water source: no cleaning holds if the wall gets wet again. Open the wall, gear up with an N95, goggles, and gloves, set up simple containment, and work the sequence: HEPA vacuum, detergent scrub, sanding, antimicrobial treatment, then dry to below 20 percent on the meter before closing anything up.
If the affected area is bigger than expected or the wood shows rot, stop and reassess rather than pushing through. Our DIY mold remediation guide walks through the decision points for when a homeowner cleanup is appropriate and when to bring in a certified remediation contractor.