

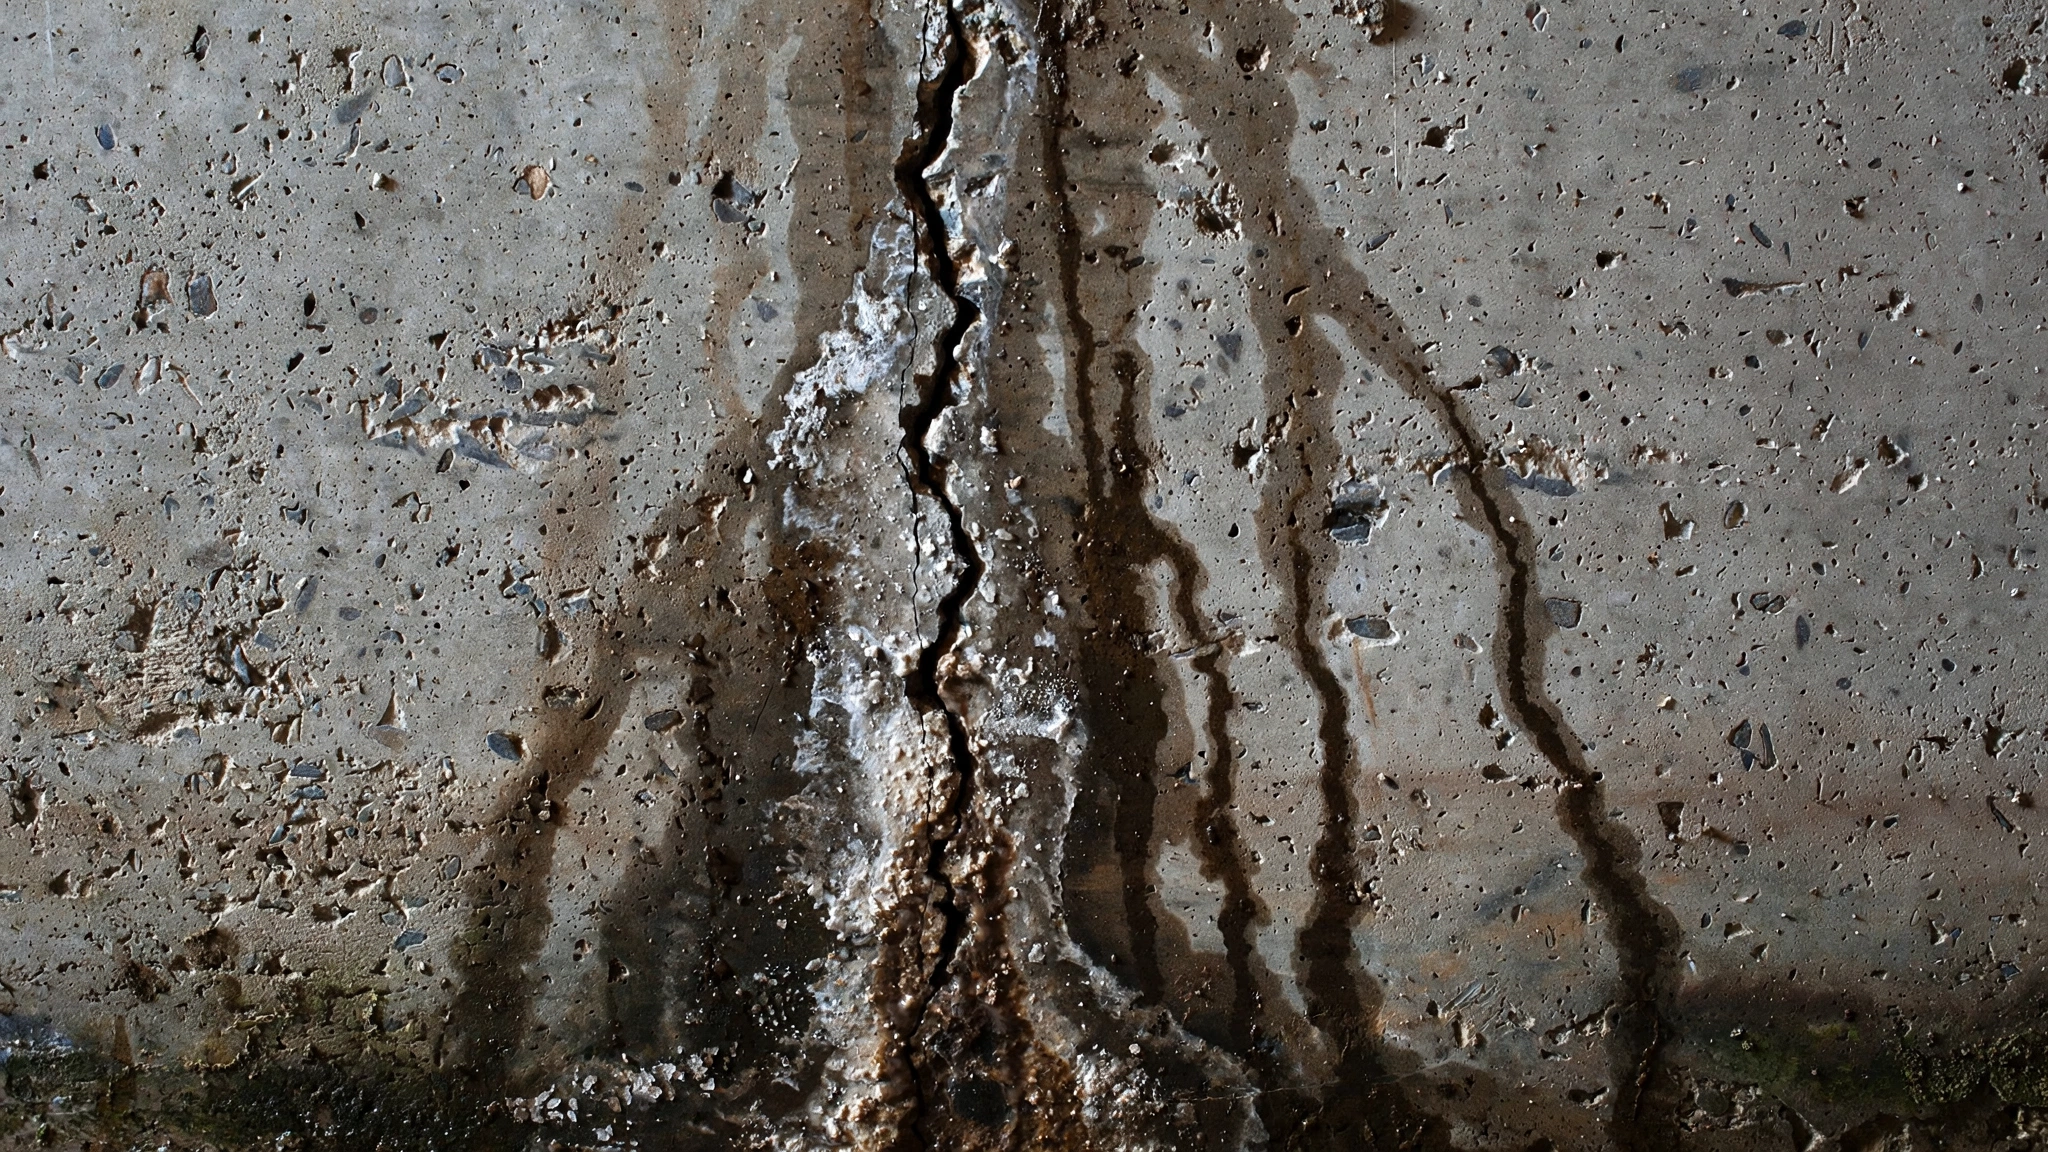
A crack in the basement wall that only leaks during heavy rain is the kind of problem homeowners put off until it gets expensive. A hairline seam that weeps a little water today can be the entry point for gallons during the next big storm, and the standing water it causes feeds mold, ruins stored belongings, and damages finished walls.
Not every crack is a crisis. Most poured concrete foundations develop thin vertical cracks as the concrete cures, and many never leak at all. But some cracks are direct channels for groundwater, and a smaller number signal wall movement that needs structural attention.
This guide covers the three crack types you will see, explains why some let water in while others stay dry, compares repair options from $300 injections to full exterior waterproofing, and shows how to tell a nuisance leak from a structural problem.
The three crack types every homeowner should know
Cracks fall into recognizable patterns that reveal a lot about the cause. Grab a flashlight and look closely.
Vertical hairline cracks
The most common crack by far. These run straight up and down through poured concrete walls, usually less than 1/8 inch wide, and form as concrete cures and shrinks in its first few years. A narrow vertical crack unchanged for years with no staining is usually harmless structurally. But vertical cracks are also the most common leakers: groundwater pressure pushes straight through them when the soil around the foundation is saturated after heavy rain.
Horizontal cracks
A crack running sideways along the wall, often at or below the frost line, is more concerning. Horizontal cracks typically come from lateral soil pressure pushing inward, often after soil freezes and expands or after heavy rains saturate expansive clay. A wall bowing inward along with a horizontal crack needs professional evaluation, not just a leak repair.
Stair-step cracks in block foundations
Concrete block foundations crack along the mortar joints, creating a stair-step pattern. Small, even stair-step cracks often come from normal settlement. Wide or uneven ones, especially where one side of the crack is offset from the other, can indicate differential settlement worth having an engineer look at.
Why some foundation cracks leak and others stay dry
A crack is only half the story. Whether it leaks depends on water pressure outside the wall. During dry weather a crack can sit quietly for years; after sustained rain or snowmelt, saturated soil builds hydrostatic pressure that forces water through any opening it can find. That is why basement leaks so often appear only during storms.
Grading, gutters, and drainage decide how much pressure builds. Downspouts that dump water next to the foundation and soil that slopes toward the house both raise the odds that a minor crack becomes an active leak. Fixing the leak often starts outside, not at the crack itself.
One important distinction: water entering through a wall crack is not the same as a plumbing leak. If the basement is wet with no visible wall crack, or the floor itself is damp in a slab-on-grade home, you may have a pipe leaking below the concrete. Our guide to slab leak detection and repair covers that separate problem.
DIY assessment: what to check before you call anyone
Measure the crack’s width at its widest point. Hairline cracks under 1/16 inch are typically cosmetic; cracks between 1/16 and 1/4 inch are the usual candidates for injection repair; anything wider deserves a professional assessment.
Look for movement over time. Mark the ends of the crack with a pencil and the date, then check back in a few months. If the marks no longer line up with the crack ends, the wall is still moving and you need an engineer, not a caulk gun. Also look for efflorescence, the white powdery residue left when water passes through concrete and evaporates. Heavy efflorescence along a crack means water has been moving through it regularly, even if you never saw it wet.
Check the walls after the next heavy rain and note exactly where water appears: at the crack, along the wall-floor joint, or under windows. A crack that only weeps during storms points to hydrostatic pressure. Water that appears constantly, rain or shine, suggests a high water table or a plumbing issue instead.
Repair options ranked by cost and situation
The right fix depends on the crack type, whether water is actively coming in, and whether the wall is moving.
Polyurethane injection: $300 to $800 per crack
The most common professional repair for leaking vertical cracks. A contractor injects expanding polyurethane foam into the crack from inside the basement; the foam fills the full depth of the wall and cures into a flexible, watertight seal. Because it flexes slightly, it tolerates the tiny seasonal movement that cracks rigid repairs. For a single non-structural vertical crack that leaks, this is usually the best value, and the job takes a couple of hours with no excavation.
Epoxy injection: $400 to $900 per crack
Epoxy uses the same delivery method but a rigid resin that bonds the concrete back together, effectively welding the crack. It suits cracks needing structural bonding restored, but it is less forgiving of movement than polyurethane and should only be used on cracks confirmed as non-active.
Exterior waterproofing: $3,000 to $10,000 or more
The most thorough fix: excavating down to the footing outside the wall, applying a waterproof membrane, and installing or replacing exterior drain tile. This stops water before it reaches the wall instead of sealing the crack from inside. It is the standard recommendation when multiple cracks leak or interior injection has already failed. Costs scale with excavation depth and access. See our basement waterproofing cost breakdown for line-item pricing.
Interior drain and sump systems: $3,000 to $8,000
An interior perimeter drain collects water at the wall-floor joint and routes it to a sump pump before it can flood the floor. This does not seal the crack itself, but it manages the water coming through. It is the pragmatic choice when outside excavation is impossible or water enters from multiple spots. Paired with a sump pump and battery backup, it handles high water tables well.
Warning signs that a crack is structural trouble
Most leaking cracks are a waterproofing problem, not a structural one. Call a structural engineer, not just a waterproofing contractor, if you see any of the following:
- A horizontal crack, especially with the wall bowing or bulging inward
- Stair-step cracks where one side is offset from the other by 1/4 inch or more
- Cracks that keep widening after you mark and monitor them
- Diagonal cracks at door or window corners, wider at one end
- Cracks paired with uneven floors, sticking doors, or gaps around upstairs window frames
An engineer’s evaluation typically costs $300 to $800 and is money well spent before committing to a big repair. Waterproofing companies sell waterproofing; an independent engineer tells you whether the wall itself needs help.
Stop water from reaching the wall in the first place
The cheapest crack repair is the one you never need because water never reaches the wall. Walk your property in the rain and watch where roof runoff goes. Downspouts should discharge at least 4 to 6 feet from the foundation through extensions or buried drains; a downspout dumping at the foundation corner will defeat any crack repair eventually.
Grade the soil so it slopes away from the house, roughly 6 inches of drop over the first 10 feet. Where grading alone cannot handle the volume, an exterior French drain installation intercepts groundwater before it reaches the wall. For broader flood preparedness, Ready.gov’s flood guidance covers property flood risk, and FEMA maintains flood maps for homes in flood-prone areas.
Frequently Asked Questions
Can I seal a foundation crack with hydraulic cement myself?
Hydraulic cement can patch a dry crack cosmetically, but it sets rigid and water pressure can push it out of an actively leaking crack. For cracks that actually leak, polyurethane injection is the proven option; DIY kits cost $100 to $200, though pro installation is usually worth it for a first repair.
Will a crack repair last, or will it leak again?
Properly injected polyurethane holds for decades on stable cracks. Repairs fail most often when the wall is still moving, when outside water pressure increases, or when a rigid material was used where flexibility was needed. Controlling drainage outside the wall protects the repair.
How much does it cost to fix a leaking basement crack?
A single vertical crack repaired by polyurethane injection typically costs $300 to $800. Interior drain systems run $3,000 to $8,000 for a full basement perimeter, and exterior excavation waterproofing runs $3,000 to $10,000 or more. Get at least two quotes for anything beyond a single injection.
Does homeowners insurance cover foundation crack leaks?
Usually not for seepage. Standard policies typically exclude water that seeps through foundations as a maintenance issue, though sudden events like a burst pipe inside the wall may be covered. Gradual seepage through cracks is almost always the homeowner’s responsibility.
Should I repair foundation cracks from the inside or the outside?
Inside injection is right for isolated, non-structural cracks: fast, clean, and affordable. Outside excavation is warranted when several cracks leak, the wall has structural problems, or interior repairs have failed. Many pros combine inside injection with exterior drainage improvements.
How long does crack injection take?
A single polyurethane injection usually takes 1 to 2 hours. Exterior excavation can take several days to a couple of weeks depending on depth and access. Interior drain systems typically take 2 to 4 days to install.
Your next steps
Identify and measure the crack, mark its ends, and watch it through one rainy spell. If it is a stable vertical crack under 1/4 inch that only weeps during storms, get polyurethane injection quotes from two local basement waterproofing contractors. If it is horizontal, widening, or displaced, bring in a structural engineer first.
Meanwhile, fix the water delivery problem outside: extend downspouts and correct the grade. If water has already pooled on the basement floor, follow our guide on how to dry a flooded basement to get it dry quickly and stop mold before it starts.